 Policy Sign Off
This SharePoint Add-in creates a way for staff to read, acknowledge and agree to company policies online.
Bulletproof Apps are no longer available for download in the Microsoft AppSource store and will be retired permanently on December 1, 2022. Please contact Bulletproof for custom app development services using Microsoft 365 and Microsoft Azure.
Click on any category or help topic to expand.
Getting Started
Follow these steps to download Policy Sign Off from Microsoft AppSource. (We'll do our best to keep the screenshots up to date, your actual steps may vary)

When browsing web pages describing Policy Sign Off on the Bulletproof Apps for SharePoint site, click the Download from Microsoft AppSource button. Or, go directly to https://appsource.microsoft.com and search for "Bulletproof".

On the Microsoft AppSource page for Policy Sign Off, click GET IT NOW.

Links to the terms of use and privacy policy are provided. Click Continue.

Select a SharePoint site, and click Continue. This step makes the app available to SharePoint. (Note: to make the app available to all site collections, install the app at the root site collection of your SharePoint tenant.)

A link is provided that describes the required permissions for the app. Click ADD IT.

You may be asked to click Continue to confirm, or click Trust It.

Uncheck the box if you don't want to immediately add Policy Sign Off to the root site of your site collection. Click Return to site.
To add Policy Sign Off to a specific site, follow the steps in the next help topic How do I add the app to my SharePoint site.
After downloading the Policy Sign Off app from Microsoft AppSource, you can add the app to a site just like any other list or library. Follow these steps:
Before you add the Policy Sign Off app to your SharePoint site, consider the following:
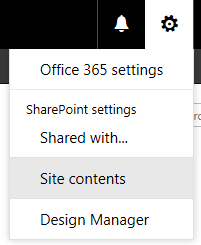
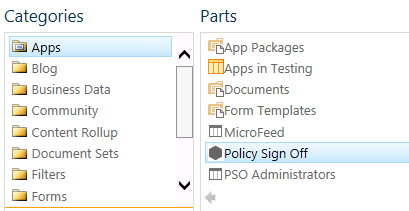
Open the gear menu, and select Site Contents.
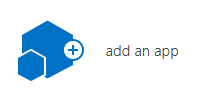
In the Classic Experience, click add an app.
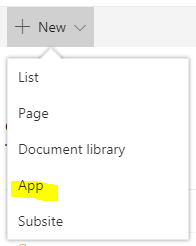
In the New Experience (the Modern UI), select New > App.

Click the icon for Policy Sign Off.

If this is the first time you are adding the app to your site, you'll need to grant permissions. Click Trust it. The following permissions are required:
Information about data and privacy can be found at https://bulletproofapps.azurewebsites.net/Home/Privacy.

When the installation is completed, you should see Policy Sign Off listed in your Site Contents.
**NOTE** The Internet Explorer browser is not officially supported by Bulletproof.
Add https://bppolicysignoff.azurewebsites.net to your Trusted Sites list, or you may not be able to browse the app. You may only see error messages or timeout messages, because the browser doesn't trust the site. This not only applies to the Internet Explorer browser, it could help other browsers as well.
No step-by-step instructions for this topic.

From the navigation menu, click Deploy.

Under the heading Infrastructure Definitions, you can review a list of all Site Columns, Site Content Types, Lists and Libraries that will be deployed to your site. Site Columns and Content Types are deployed to the Site Collection, and Lists are deployed to the site where the app is installed. You must have appropriate permissions to these locations.
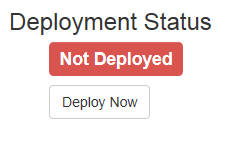
Under the heading Deployment Status, click Deploy Now.

Messages will be displayed showing the progress of the deployment. When the deployment is completed, the status indicator will read Deployed.
In the upper left-hand corner of the screen, click the link Go back to [your site name].
Click Site Contents using the gear menu or from the left-hand navigation.

You should see four (4) new lists:
All policy information is added to the PSO Policies list. Links can be added to any document or video that staff are required to acknowledge, not just company policies. Follow these steps:
Open the gear menu, and click Site Contents.
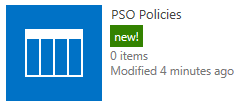
Click the PSO Policies list.
Click New Item (Classic Experience).

Or, if you are using the New Experience (Modern UI), click New.

Enter policy information, then click Save.
Open the gear menu, and click Site Contents.
Click the Policy Sign Off app.
In the navigation menu, click Sign Off Page.
Verify that you can see policy information entered in the PSO Policies list.

Check the I acknowledge... checkbox, and click Save.
Click Go back to [My Site Name].
Open the gear menu, and click Site Contents.
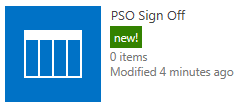
Click the PSO Sign Off list.

Verify that you see a record of your acknowledgment. Click the Policy Name to view the item.

Notice that when items are saved, the Created and Last Modified dates inform you that the Policy Sign Off app created the item "on behalf of" the SharePoint user.
New in version 1.1.0. To get started, add yourself to the PSO Staff List so that you can test the Sign Off Reports. Eventually, all staff must be added to this list if you want to generate reports about who has or has not acknowledged policies. Follow these steps:
Open the gear menu, and click Site Contents.

Click the PSO Staff List.
Click New Item (Classic Experience).
Or, if you are using the New Experience (Modern UI), click New.

Enter staff information, then click Save.

To quickly add staff in bulk to this list, you can copy and paste into the list. In the LIST ribbon, click Quick Edit.

Select and copy data from an Excel spreadsheet, and paste it into the list.
IMPORTANT: this method will not work unless you do the following.
New in version 1.1.0. The Sign Off Reports page compares the PSO Staff List to the PSO Sign Off list and provides reports on who has or has not acknowledged policies.
Open the gear menu, and click Site Contents.
Click the Policy Sign Off app.

In the navigation menu, click Sign Off Reports.

Select a policy, and click Generate Report.

The following report options are available in the Show menu. The staff listed in the reports will be restricted to the staff identified in the Policy Required For column in the PSO Policies list, if applicable.
You can use the built-in permission levels that come with SharePoint, or create your own custom levels. Follow these guidelines:
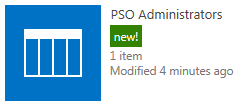
The PSO Administrators list contains a list of all users who are administrators of the Policy Sign Off app. Administrators can see all of the administrative pages and menu items. Regular users can only see the Sign Off Page.
The PSO Policies list contains information for all company policies (or other documents/videos that require acknowledgment). This includes the Policy Name, Effective Date, Link to the Policy, etc.
The PSO Sign Off list contains a record of when all staff have agreed to and acknowledged their assigned policies.
**NEW** in version 1.1.0. The PSO Staff List contains a list of all staff and managers. You must enter data in this list for the Policy Sign Off Reports page to work, because a list of all staff must be compared to the list of staff who have acknowledged policies.
Bulletproof Apps for SharePoint use the SharePoint Provider Hosted Add-In Framework. This means that Bulletproof hosts a website in Microsoft Azure cloud services that contains all of the app's web pages and web parts. Every website in Microsoft Azure is assigned a web address like "myapp.azurewebsites.net". When you click on the app in your SharePoint site, you get redirected to this site. All apps are secure and authenticated by your SharePoint site.
No step-by-step instructions for this topic.
Policy Sign Off - User Guide
All items that require your acknowledgment are listed on the policy sign off page. Follow these steps:
Open the gear menu on the site where the app is installed, and click Site Contents.
Click the Policy Sign Off app.
(App administrators only) In the navigation menu, click Sign Off Page.
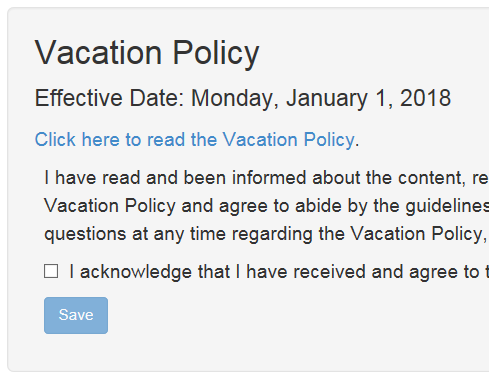
Find the desired policy, and click the link to read the document (or watch the video).
Check the I acknowledge... checkbox, and click Save.
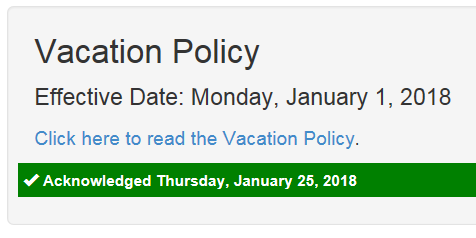
An Acknowledged message will be displayed. Please note that the date will not be displayed until the page is refreshed.
All previous acknowledgments are listed on the policy sign off page. Follow these steps:
Open the gear menu on the site where the app is installed, and click Site Contents.
Click the Policy Sign Off app.
(App administrators only) In the navigation menu, click Sign Off Page.
All policies that you have acknowledged will be listed along with any new policies that require your sign off.
New in version 1.1.0. For details, click to expand the Getting Started category in the online help, and browse the online help topic Browse the Sign Off Reports page. You can generate reports on who has or has not acknowledged a policy.
No step-by-step instructions for this topic.
Policy Sign Off - Administration
Most users will only use the Sign Off Page. Administrators have an Administrator Dashboard and pages for Deployment Options, Configuration Options, Contact Information, Upgrade Options, and Online Help.
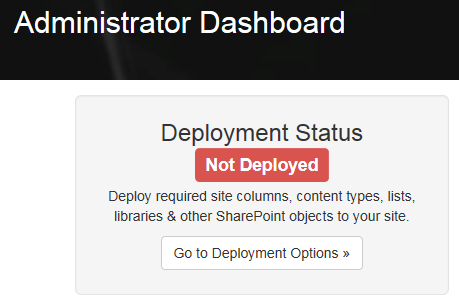
The Administrator Dashboard gives you a quick status update on the following:

The Deployment Options page is where you deploy Site Columns, Content Types, Lists and Libraries to your site. There are three (3) lists required for Policy Sign Off data. All data remains on your SharePoint site, so that you have complete control over your data.
**NEW** in Version 1.1.3. The Configuration Options page is available with a free license and paid subscriptions.
The User Management section at the bottom of the page is used to manage user licenses.
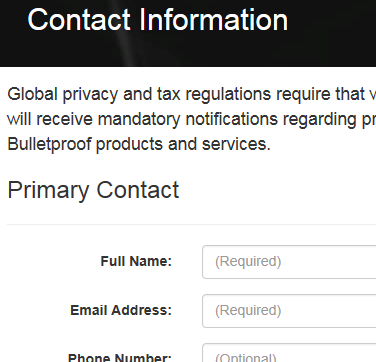
The Contact Information page is where you enter primary contact information and communication preferences. This person will receive notifications regarding product updates and maintenance.
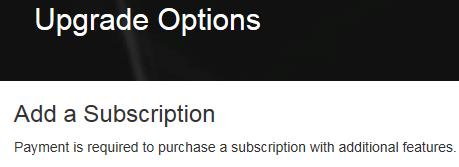
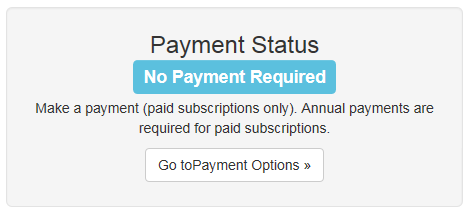
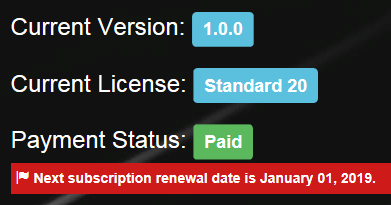
The Upgrade Options page is where you can purchase a paid subscription and manage upgrades. This page also provides status indicators and messaging regarding Current Version, Current License, and Payment Status.

The Online Help page provides all online help topics and also includes a form to submit a request to Bulletproof Support.
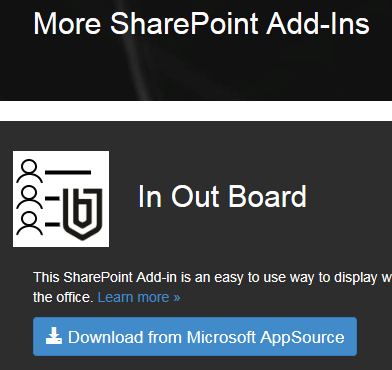
The More SharePoint Add-Ins page lists additional apps you may be interested in. Bulletproof also offers Security as a Service, Managed Services, Professional Services, Educational Services, and more.
The Sign Off Page is where staff go to agree to and acknowledge policies. This is the default page when non-administrators browse the app.
The Administrator Dashboard is the home page for app administrators and will display a variety of status messages. See below for a sample of the status messages you may see on the dashboard.
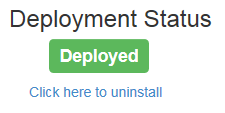
When the Company Store app is first added to any site, the Deployment Status will show as Not Deployed.
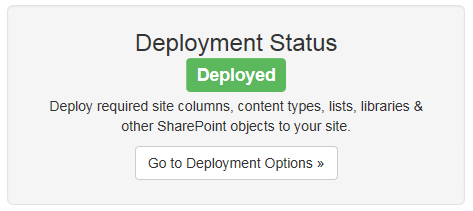
After you have completed deployment of Site Columns, Content Types, Lists and Libraries, the Deployment Status will change to Deployed.
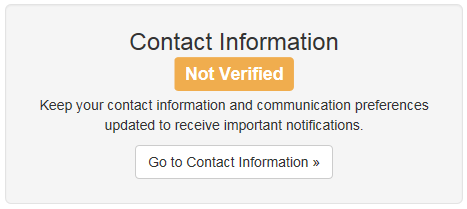
Contact Information will show as Not Verified until you confirm a primary contact and choose communication preferences.
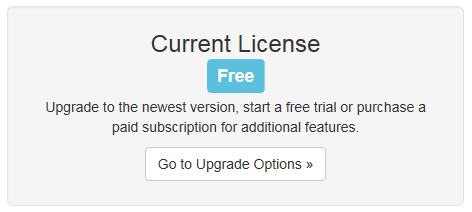
You will start with a Free license as the Current License.
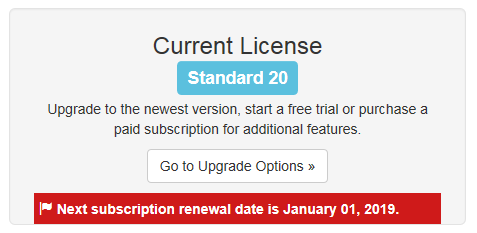
When you purchase a subscription, the Current License will show the license level. You will also see messaging about when your subscription will expire.
When using the Free version, Payment Status will show as No Payment Required.
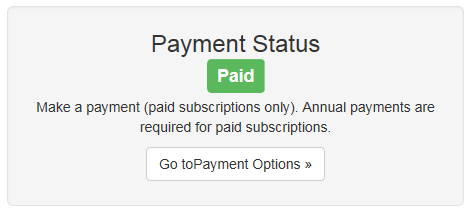
Once payment is completed and you have an active subscription, Payment Status will show as Paid.
All SharePoint lists will be visible to users of the Policy Sign Off app. Here are some recommendations to make the experience more user friendly.
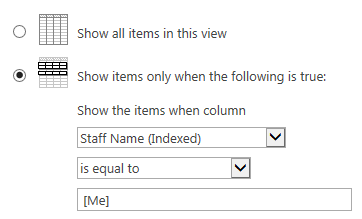
Because Policy Sign Off data is saved in standard SharePoint lists, your staff can browse the list data just as easily as browsing any other SharePoint site. We recommend that you update the default view on the PSO Sign Off list so that data is restricted to the current user.
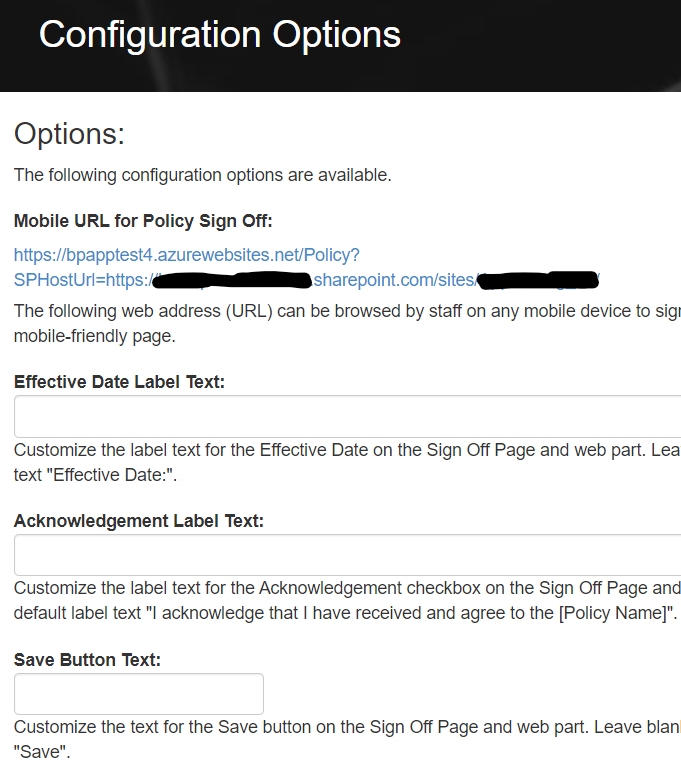
**NEW** in Version 1.1.3. Yes, the entire Sign Off Page and web part is customizable. Some elements can be customized for each policy using the PSO Policies list, and some elements are customized globally using the Configuration Options app page.
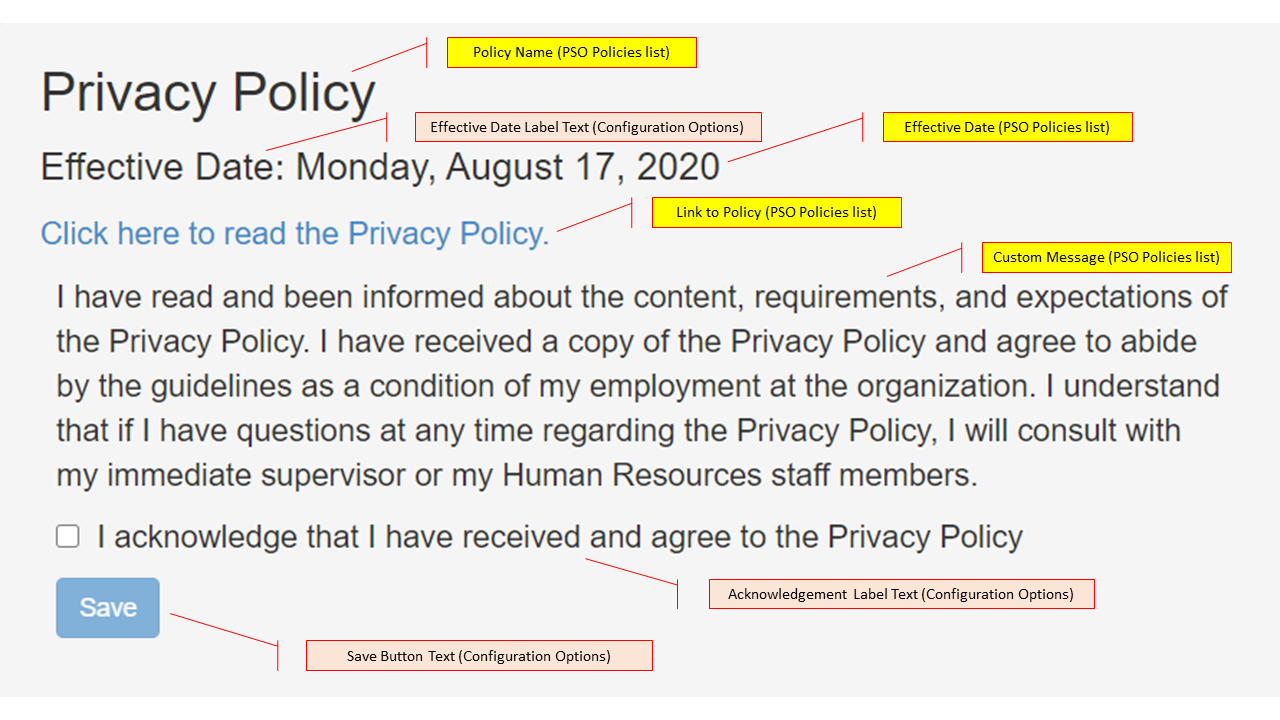
Use the PSO Policies list to customize the Policy Name, Effective Date, Link to Policy, and Custom Message. These customizations apply to each individual policy.
Use the Configuration Options app page to customize the Effective Date Label Text, Acknowledgement Label Text, and Save Button Text. These customizations apply to all policies.
Yes, you can link to anything that staff are required to agree and acknowledge. The documents and videos must be accessible using a web browser, and they can be stored inside or outside of SharePoint.
No step-by-step instructions for this topic.
Yes, follow these steps to create an email alert on the PSO Sign Off list. Or, you can use Power Automate (a.k.a., Flow) to create custom workflows on any SharePoint list created by the app.
On your SharePoint site, open the gear menu, and click Site Contents.
Click the PSO Sign Off list.
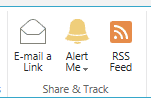
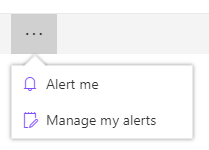
Using the New Experience (Modern UI), open the ellipsis menu (...), and click Alert Me.
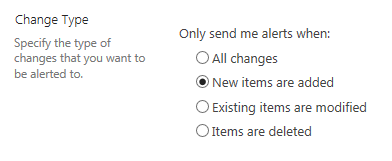
Enter a meaningful Alert Title, for example "New Policy Acknowledgment". Set the Change Type to New items are added. Update other options as desired, and click OK.
Yes, the Sign Off Page is available as a web part which can be added to any SharePoint page on the same site where the app is installed. Follow these steps:

If your web page uses the New Experience (Modern UI), click Edit.

Click the Plus (+) icon to add a web part, and click Policy Sign Off.

You may want to resize the web part to prevent unnecessary scroll bars. If so, click the pencil icon.
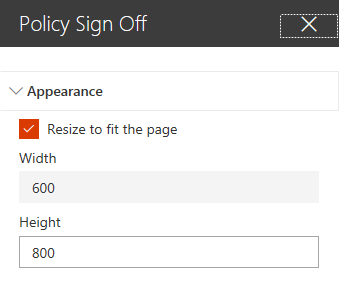
Make one or more changes as needed.
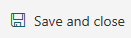
Click Save and close (or click Publish).

If your page uses the Classic Experience, follow these steps. These screenshots were taken using a Web Part Page. Click Edit Page.

Click Add a Web Part in the desired web part zone.
Select Policy Sign Off, and click Add.

Edit the web part properties, and adjust the Height and Width to manage scroll bar issues. Click Apply to save new web part properties.

Click Stop Editing to save the page.
Minor software patches and bug fixes will be applied automatically. However, when new functionality becomes available, you'll be notified that a new version is available. Follow these steps to upgrade to a new version.
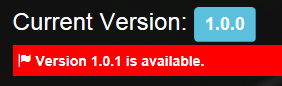
When new functionality is available, you'll see messages displayed on both the Administrator Dashboard and Upgrade Options pages.

From the navigation menu, click Upgrade.

Click Show/Hide Version History to see a list of all new features and bug fixes included in the new version.

Click Upgrade Now. New SharePoint infrastructure will be deployed, and the new functionality will be immediately available.
You can uninstall the app from the Deployment Options page. Follow these steps:
On the Deployment Options page, select Click here to uninstall.
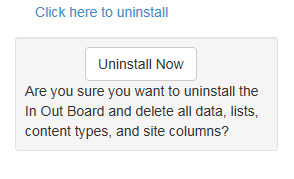
Click Uninstall Now to confirm.
Manage User Licenses

In the top navigation menu for your app, click Configure.

Scroll down to the User Management section.

If your Total Licenses shows Unlimited, then your app can be used by an unlimited number of users. No user management is required. Please note that depending on the app, there may be restrictions on the number of users allowed per site.
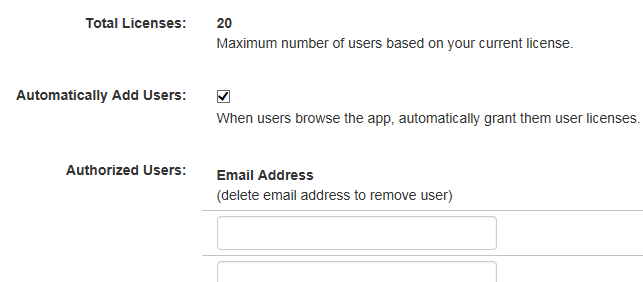
Otherwise, Total Licenses will show the maximum number of user licenses available, and additional options will be visible.
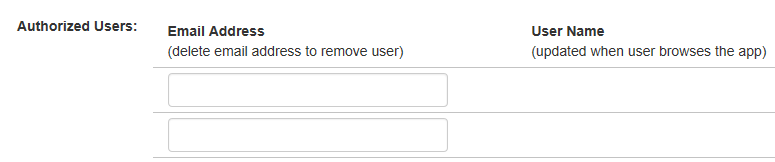
To manually add a new Authorized User, enter their email address in one of the textboxes and click Save.
Purchase a Subscription
To start the payment process, go to the Upgrade Options page and click Pay Now for the desired subscription level. You'll be taken to the Bulletproof Apps for SharePoint website to Verify Your Address and confirm your purchase. Then, you'll be redirected to PayPal to complete the purchase. Follow these steps to purchase a subscription.
From the navigation menu, click Upgrade.

Click Pay Now to start the payment process.
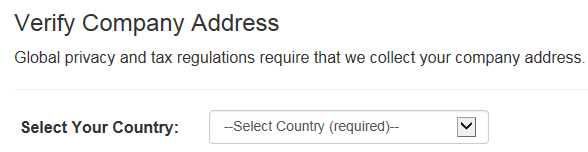
A new browser tab will open, and you will be redirected to the secure Bulletproof Apps for SharePoint website to verify your address. Enter your company address, then click Verify and Save.

Click Buy Now to confirm, and you will be redirected to a secure PayPal site to complete the purchase. A variety of payment methods are available.
After you complete your purchase, PayPal will notify us of the payment. The Payment Status on the Administrator Dashboard and Upgrade Options pages should be immediately updated to Paid. If your payment status is not updated within 24 hours, please contact Bulletproof Support for assistance.
Get Help
Before contacting Bulletproof Support, please browse the online help topics on this site. We try to provide all of the information you need to install, configure, administer, and use the app.
No step-by-step instructions for this topic.
The app administrator can submit a request by filling out the form on the Online Help page. Follow these steps:

Go to your SharePoint site where the app is installed and click on the app. Then click Get Help in the navigation menu.
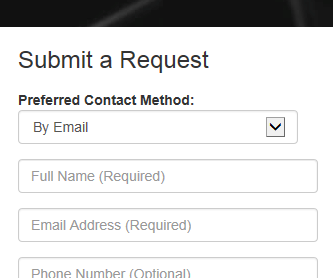
Under the heading Submit a Request, fill out the form and click Save. A member of the Bulletproof support team will contact you.
Yes, Bulletproof has a team of SharePoint Support staff and offers support contracts as a Managed Service. Bulletproof also has a team of SharePoint Consultants in the Professional Services division who can assist you with planning, architecture, custom development, and general consulting. Go to https://www.bulletproofsi.com for more information.
No step-by-step instructions for this topic.
Yes, please visit the Bulletproof Apps website at https://bulletproofapps.azurewebsites.net for detailed descriptions.
No step-by-step instructions for this topic.